
George Foreman Grill - Cooking Times For Common Foods

How do you determine the George Foreman grill cooking times for common foods? Well, it depends on what you're cooking. If you're cooking pork chops, the George Foreman grill cooking times will vary from approximately 10 to 15 minutes, assuming you're not fixing anything else in the grill.
George Foreman Grill - Cooking Times For Common Foods
Homes for auction - 2740 Sugarloaf Club Drive, Duluth, GA


Tube. Duration : 1.43 Mins.
Homes for auction - 2740 Sugarloaf Club Drive, Duluth, GA
Property Site: http://tour.remax-georgia.com/home/6FQ86Q 300K IN RENOVATIONS INSIDE AND OUT - OVER SIZED BEDROOMS WITH SEP BATHS AND WALK IN CLOSETS - GOURME...
Homes for auction - 2740 Sugarloaf Club Drive, Duluth, GA
Homes for auction - 2740 Sugarloaf Club Drive, Duluth, GA
Homes for auction - 2740 Sugarloaf Club Drive, Duluth, GA
Homes for auction - 2740 Sugarloaf Club Drive, Duluth, GA
No URL Homes for auction - 2740 Sugarloaf Club Drive, Duluth, GA
Three Steps to Cooking Perfect Steak on Your Outdoor BBQ Grill
If you're like me, When you crank up that BBQ grill for the season it's all about cooking perfect steak. I love all kinds of foods cooked on an outside bbq grill, but none says summer quite like that sweet smell of steak on the grill. For me, the results are always predictable and always pretty close to perfect. This is because I use the same process every time and I start with the end result in mind. So that's my first tip: cooking perfect steak starts with identifying what that means to you and then learning about the basic cooking method so that you can navigate to that desired point. You'll have to decide on the definition of perfection for yourself - that's the fun part. But the next few paragraphs should help with the second part - learning the process and the basic cooking method that helps get you to your perfection.
Three Steps to Cooking Perfect Steak on Your Outdoor BBQ Grill
1566 Goyer Rd SE, Palm Bay, FL - 4,900
Tube. Duration : 1.20 Mins.
1566 Goyer Rd SE, Palm Bay, FL - 4,900
1566 Goyer Rd SE, Palm Bay, FL - 4,900
1566 Goyer Rd SE, Palm Bay, FL - 4,900
1566 Goyer Rd SE, Palm Bay, FL - 4,900
1566 Goyer Rd SE, Palm Bay, FL - 4,900
No URL 1566 Goyer Rd SE, Palm Bay, FL - 4,900
How to Build an Outdoor Grill
Building an outdoor grill is an easy weekend project. Outdoor grills add style and function to any backyard deck or patio. With just a little bit of pre-planning it's easy to learn how to build an outdoor grill in ten easy steps.
How to Build an Outdoor Grill

Outdoor Thanksgiving: Grill Your Turkey
Video Clips. Duration : 4.37 Mins.
Outdoor Thanksgiving: Grill Your Turkey
Outdoor Thanksgiving: Grill Your Turkey
Outdoor Thanksgiving: Grill Your Turkey
Outdoor Thanksgiving: Grill Your Turkey
Outdoor Thanksgiving: Grill Your Turkey
No URL Outdoor Thanksgiving: Grill Your Turkey
How to Build an Outdoor Grill
Building an outdoor grill is an easy weekend project. Outdoor grills add style and function to any backyard deck or patio. With just a little bit of pre-planning it's easy to learn how to build an outdoor grill in ten easy steps.
How to Build an Outdoor Grill
Black Bear at the Taku Glacier Lodge Outdoor Grill
Video Clips. Duration : 0.83 Mins.
Black Bear at the Taku Glacier Lodge Outdoor Grill
Adult black bear licking the drippings at the outdoor grill at Taku Glacier Lodge near Juneau, Alaska.
Black Bear at the Taku Glacier Lodge Outdoor Grill
Black Bear at the Taku Glacier Lodge Outdoor Grill
Black Bear at the Taku Glacier Lodge Outdoor Grill
Black Bear at the Taku Glacier Lodge Outdoor Grill
No URL Black Bear at the Taku Glacier Lodge Outdoor Grill
Three Steps to Cooking Perfect Steak on Your Outdoor BBQ Grill
If you're like me, When you crank up that BBQ grill for the season it's all about cooking perfect steak. I love all kinds of foods cooked on an outside bbq grill, but none says summer quite like that sweet smell of steak on the grill. For me, the results are always predictable and always pretty close to perfect. This is because I use the same process every time and I start with the end result in mind. So that's my first tip: cooking perfect steak starts with identifying what that means to you and then learning about the basic cooking method so that you can navigate to that desired point. You'll have to decide on the definition of perfection for yourself - that's the fun part. But the next few paragraphs should help with the second part - learning the process and the basic cooking method that helps get you to your perfection.
Three Steps to Cooking Perfect Steak on Your Outdoor BBQ Grill
It All Starts BEFORE Cooking Tenderloin!
Outdoor Grill
Three Steps to Cooking Perfect Steak on Your Outdoor BBQ Grill
For most carnivores, the beginning of the process towards steak nirvana is when you actually start cooking tenderloin. Unfortunately, this approach leaves out one of my best secrets for cooking perfect steak: start with the whole tenderloin. There are so many advantages to buying a whole tenderloin and breaking it down yourself. You can definitely save some money learning how to do this, and it is a lot easier than you think. When you buy the whole tenderloin, the first thing you have to do before cooking tenderloin is to remove the "chain". The chain is the side muscle; it contains a lot of the fat and is great for use later in stews, chilis or even my favorite treat: Tenderloin Philly cheese steak. But that's a whole other way for cooking tenderloin and beyond the scope of this article! Once you've removed the chain, you must remove the thick top end of the tenderloin - "the head". This, too can be set aside and used later. What you are left with is a long tenderloin from which to cut your steaks. The most important thing to remember is to try to cut the steaks of consistent size by weight. Consistent size equals consistent cooking, which equals reliable cooking! Use a scale and aim for a consistent size somewhere between 3 and 5 oz per steak, depending on who you're cooking for.
Three Steps to Cooking Perfect Steak on Your Outdoor BBQ Grill
Do you Really Know How to Grill Beef?
If you believe most people, grilling takes no skill at all. It's so much easier than cooking and anyone can do this with little advance planning or common knowledge. Right? This is actually one of my favorite cooking myths! Knowing correctly how to grill beef (or anything else) is essential to outdoor cooking success. Grilling is direct source conductive heat. Cooking is to grilling as driving is to flying a rocket ship. Everything happens quickly and intensely with grilling and that includes mistakes. So, let's begin with the simple process:
First, get the grill as hot as possible. Keep the lid down while heating the grill, but open when cooking. This is another common grilling mistake. If you close the lid while cooking, the method you are applying is similar to that of oven cooking. Why bother doing it outside on the grill? Brush the steak with olive oil and season with salt and pepper. You can use any other kind of seasoning or rub here, but I find that the true steak flavor comes from a good cut of meat and you don't need anything else. You might have a different opinion so season as you see fit. Place the steak on the hot grill "show side" down - meaning the side you'd want to display on the plate goes down on the grill first. Now observe for signs of done-ness. When the steak is 75% done on one side, flip it over and cook the rest of the way.
Knowing how to grill beef is a simple process, but most people still go into it blindly. By following the steps, you will always be working towards cooking the perfect steak, rather than just cooking a steak until it has reached a safe to eat temperature and texture. The fine line of difference between acceptable and perfection make all of the difference, and with perfection so reliably reachable, why not aim high?
How Long Should the Meat Cook? Until It's Done!
So, here we are. We always arrive at the same question. In travel, it's: are we there yet?; and in cooking, it's: how long should the meat cook?. Well, I have one answer to all of the how long questions: until it's done. Yes, it really is that simple. Let the meat cook until it's done. And now we get into the more interesting question: how do I know when it's done? I often say that cooking is a journey - so you are a tourist, an observer on that journey. As you observe what happens to the steak during the cooking process, you will notice some predictable things happen. First, at 165 degrees, proteins coagulate. What you will see when this happens is that the steak will stiffen and shrink. You will see the sides of the tenderloin start to get brownish gray. At 320 degrees, the sugars caramelize. If you lift a side of the steak up slightly and look underneath, you will see the formation of grill marks to indicate this is happening. You will also begin to smell that nice, sweet, smell - telling you that you are cooking perfect steak and all is happening as it should. When the steak is 50-75% cooked on one side, it reaches what is termed in French culinary as "a point". You will observe the juices start to bubble up to the red top. This indicates it is time to flip the steak, allowing it to finish its cooking on the other side. The last observation you will make to determine done-ness is the most quantitative because you will use a thermometer. Don't cut open your steak to peer into the middle! Don't stab at it with a fork! Both of these activities will release all of the juiciness you just worked so hard to achieve! 125-135 degrees is rare; 145-150 is medium and 160-165 is well done. So pick your temperature and remove the steak from the grill. But before serving it, let it rest for 5-10 minutes so that the juices can redistribute and run off onto the non-serving plate.
Just by understanding these simple facts about grilling, cooking perfect steak is almost a guaranteed result. Go ahead and get your own whole tenderloin today and get ready for some great outdoor eating!
Three Steps to Cooking Perfect Steak on Your Outdoor BBQ Grill

Adult black bear licking the drippings at the outdoor grill at Taku Glacier Lodge near Juneau, Alaska.
Keywords:
Step 1: Learning how to build an outdoor grill, like with any other home improvement project begins with gathering materials for the project. All you need are a few bricks, a grill grate, and some sand.
Outdoor Grill
How to Build an Outdoor Grill
Step 2: Find the right spot for the outdoor grill. The base needs to be perfectly level. If there are any bumps dips or ruts the grill won't sit flush and could collapse.
How to Build an Outdoor Grill
Step 3: If you're putting the grill on a concrete pad such as your patio deck then all you need to do is start stacking up the bricks. If however you plan on locating the outdoor grill somewhere in your yard, you will need to remove the top layer of grass and dig a footing several inches deep. Then tamp down the loose dirt to ensure the outdoor grill has a steady foundation. What you will shoot for is a 3-foot by 3-foot square. Arrange the bricks along the bottom layer. Making sure they all sit flat against the floor.
Step 4: Keep stacking bricks on top of the bottom layer until they are about 3 feet high. You should now have a 3-foot by 3 foot by 3-foot cube.
Step 5: After you have built the base up to 3 feet high do a shake test. Gently shake the grill. If it's well built then it shouldn't wobble at all. If it does wobble however find where the problem is and redo the bricks until the grill feels sturdy.
Step 6: Start building the firebox. Instead of bricking in the whole base here you are looking to create space. Simply lay a single row of bricks along 3 sides of the grill. You want a 14-18 inch high wall.
Step 7: Grab the bag of sand and shake it inside the firebox. The goal here is to fill any cracks between the bricks so you have a nice flat surface for pouring in the coals.
Step 8: Sweep out any excess sand. After all the cracks are filled and everything is flush, sweep out any excess sand so that the grill has a nice uniform appearance.
Step 9: Place the grill grate on top of the wall firebox. Make sure that the grill grate is safely supported. If it does not sit flush with the bricks it could fall into the glowing coals. Safety first!
Step 10: Once again check for wobble. If the grill is sitting sturdy it's time to break out the briquettes and brisket, grab the family and barbeque.
There you have it, how to build an outdoor grill in ten easy steps. It's an easy afternoon project that pays for itself in increased home value as well as evening enjoyment!
How to Build an Outdoor Grill
Tags:
It All Starts BEFORE Cooking Tenderloin!
Outdoor Grill
Three Steps to Cooking Perfect Steak on Your Outdoor BBQ Grill
For most carnivores, the beginning of the process towards steak nirvana is when you actually start cooking tenderloin. Unfortunately, this approach leaves out one of my best secrets for cooking perfect steak: start with the whole tenderloin. There are so many advantages to buying a whole tenderloin and breaking it down yourself. You can definitely save some money learning how to do this, and it is a lot easier than you think. When you buy the whole tenderloin, the first thing you have to do before cooking tenderloin is to remove the "chain". The chain is the side muscle; it contains a lot of the fat and is great for use later in stews, chilis or even my favorite treat: Tenderloin Philly cheese steak. But that's a whole other way for cooking tenderloin and beyond the scope of this article! Once you've removed the chain, you must remove the thick top end of the tenderloin - "the head". This, too can be set aside and used later. What you are left with is a long tenderloin from which to cut your steaks. The most important thing to remember is to try to cut the steaks of consistent size by weight. Consistent size equals consistent cooking, which equals reliable cooking! Use a scale and aim for a consistent size somewhere between 3 and 5 oz per steak, depending on who you're cooking for.
Three Steps to Cooking Perfect Steak on Your Outdoor BBQ Grill
Do you Really Know How to Grill Beef?
If you believe most people, grilling takes no skill at all. It's so much easier than cooking and anyone can do this with little advance planning or common knowledge. Right? This is actually one of my favorite cooking myths! Knowing correctly how to grill beef (or anything else) is essential to outdoor cooking success. Grilling is direct source conductive heat. Cooking is to grilling as driving is to flying a rocket ship. Everything happens quickly and intensely with grilling and that includes mistakes. So, let's begin with the simple process:
First, get the grill as hot as possible. Keep the lid down while heating the grill, but open when cooking. This is another common grilling mistake. If you close the lid while cooking, the method you are applying is similar to that of oven cooking. Why bother doing it outside on the grill? Brush the steak with olive oil and season with salt and pepper. You can use any other kind of seasoning or rub here, but I find that the true steak flavor comes from a good cut of meat and you don't need anything else. You might have a different opinion so season as you see fit. Place the steak on the hot grill "show side" down - meaning the side you'd want to display on the plate goes down on the grill first. Now observe for signs of done-ness. When the steak is 75% done on one side, flip it over and cook the rest of the way.
Knowing how to grill beef is a simple process, but most people still go into it blindly. By following the steps, you will always be working towards cooking the perfect steak, rather than just cooking a steak until it has reached a safe to eat temperature and texture. The fine line of difference between acceptable and perfection make all of the difference, and with perfection so reliably reachable, why not aim high?
How Long Should the Meat Cook? Until It's Done!
So, here we are. We always arrive at the same question. In travel, it's: are we there yet?; and in cooking, it's: how long should the meat cook?. Well, I have one answer to all of the how long questions: until it's done. Yes, it really is that simple. Let the meat cook until it's done. And now we get into the more interesting question: how do I know when it's done? I often say that cooking is a journey - so you are a tourist, an observer on that journey. As you observe what happens to the steak during the cooking process, you will notice some predictable things happen. First, at 165 degrees, proteins coagulate. What you will see when this happens is that the steak will stiffen and shrink. You will see the sides of the tenderloin start to get brownish gray. At 320 degrees, the sugars caramelize. If you lift a side of the steak up slightly and look underneath, you will see the formation of grill marks to indicate this is happening. You will also begin to smell that nice, sweet, smell - telling you that you are cooking perfect steak and all is happening as it should. When the steak is 50-75% cooked on one side, it reaches what is termed in French culinary as "a point". You will observe the juices start to bubble up to the red top. This indicates it is time to flip the steak, allowing it to finish its cooking on the other side. The last observation you will make to determine done-ness is the most quantitative because you will use a thermometer. Don't cut open your steak to peer into the middle! Don't stab at it with a fork! Both of these activities will release all of the juiciness you just worked so hard to achieve! 125-135 degrees is rare; 145-150 is medium and 160-165 is well done. So pick your temperature and remove the steak from the grill. But before serving it, let it rest for 5-10 minutes so that the juices can redistribute and run off onto the non-serving plate.
Just by understanding these simple facts about grilling, cooking perfect steak is almost a guaranteed result. Go ahead and get your own whole tenderloin today and get ready for some great outdoor eating!
Three Steps to Cooking Perfect Steak on Your Outdoor BBQ Grill
Property Site: http://tour.remax-georgia.com/home/6FQ86Q 300K IN RENOVATIONS INSIDE AND OUT - OVER SIZED BEDROOMS WITH SEP BATHS AND WALK IN CLOSETS - GOURME...
Tags:
If you like fixing French fries in the George Foreman, they will take around 20 minutes to fix. Be wary though. Although French fries taste really good they can come out a lot softer than you would like. This is especially the case if you put them underneath the meat, (so the grease runs down and gives them more flavor).
Outdoor Grill
George Foreman Grill - Cooking Times For Common Foods
For burgers, the George Foreman cooking times are much quicker. Expect to get your food done in 10 minutes or less, especially if the burgers are the flat type you get from Murry's or other discount food stores.
George Foreman Grill - Cooking Times For Common Foods
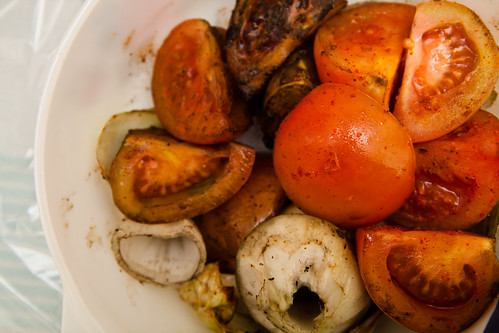
What about vegetables or even fruit, (like if you're trying to grill tomatoes)? Well, be careful here.
Vegetables and fruit cook very quickly on the grill. Even frozen you can expect your cooking times to be somewhere around 5 minutes.
Keep in mind also that you don't have to put the top down when fixing food in the grill. If you decide to do this with your cooking, it might take longer for your food to get done mainly because there's not as much heat involved.
If you're interested in finding the George Foreman cooking times for more foods, you can look online. Quite a few independent culinary professionals have given their time estimates in the form of charts and other diagrams. You may also be able to find more information from the commercials that still come on in relation to the grill.
George Foreman Grill - Cooking Times For Common Foods
Saturday, March 16, 2013
George Foreman Ggr50b Indoor Outdoor Grill - Inside Or Outside, The Choice Is Yours!
George Foreman Ggr50b Indoor Outdoor Grill - Inside Or Outside, The Choice Is Yours!
You've just opened the burgers and feel the first drop of rain hit your head. Then the heavens open. We've all been there. Another change of plan. Another barbeque not happening. Well the good news is that this need never happen to you again. George Foreman has come up trumps yet again with the George Foreman ggr50b Indoor Outdoor Grill. Yes as the name suggests, it easily converts from outdoor to indoor use. But what other features have turned the George Foreman ggr50b Indoor Outdoor Grill into a long-term best-seller?
George Foreman Ggr50b Indoor Outdoor Grill - Inside Or Outside, The Choice Is Yours!
Disc-It, Your Custom Outdoor Grill

Video Clips. Duration : 2.00 Mins.
Disc-It, Your Custom Outdoor Grill
http://disc-it.com/free Cook outdoors with your custom outdoor grill. The disc-it is fully customizable with over 300 patterns. We can make any pattern for y...
Disc-It, Your Custom Outdoor Grill
Disc-It, Your Custom Outdoor Grill
Disc-It, Your Custom Outdoor Grill
Disc-It, Your Custom Outdoor Grill
No URL Disc-It, Your Custom Outdoor Grill
How To Cook BBQ Ribs On Your Outdoor Grill
Barbeque ribs are a summertime favorite. With just the right amount of seasoning, grilling, and sauce, you will have a family hit. There are different options for grilling. The two most common are beef and pork ribs. These are varieties of rib that you will find in your local grocery store.
How To Cook BBQ Ribs On Your Outdoor Grill
Bull Brahma 5 Burner Gas Grill Inspection - BBQGuys.com
Video Clips. Duration : 1.77 Mins.
Bull Brahma 5 Burner Gas Grill Inspection - BBQGuys.com
Watch as Chef Tony lays out the features of the Bull Brahma 5 Burner Gas Grill. Also Check out the great line of Bull outdoor kitchen accessories and product...
Bull Brahma 5 Burner Gas Grill Inspection - BBQGuys.com
Bull Brahma 5 Burner Gas Grill Inspection - BBQGuys.com
Bull Brahma 5 Burner Gas Grill Inspection - BBQGuys.com
Bull Brahma 5 Burner Gas Grill Inspection - BBQGuys.com
No URL Bull Brahma 5 Burner Gas Grill Inspection - BBQGuys.com
The Weber Ranch Kettle Grill - Get The Ultimate BBQ Grill On Sale For Entertaining Big Crowds
The Weber Ranch Kettle Grill is the ultimate "you-da-man" grill! If you need to grill and barbeque for large crowds, or you just want the "best and biggest" grill out there, then this is the grill of your dreams. Learn more about this large impressive grill and where to find one at a great price.
The Weber Ranch Kettle Grill - Get The Ultimate BBQ Grill On Sale For Entertaining Big Crowds
Project Brick BBQ
Video Clips. Duration : 2.42 Mins.
Project Brick BBQ
Karel and friends build a brick bbq without any solid experience of the bbq building variety, but with enough computer skills to make a stop-frame animation ...
Project Brick BBQ
Project Brick BBQ
Project Brick BBQ
Project Brick BBQ
No URL Project Brick BBQ
How Long Do You Grill Pork Loin Per Pound?
Introduction
How Long Do You Grill Pork Loin Per Pound?

Whether you are grilling outside on the grill or in the broiler oven, there's nothing quite as tasty as a grilled pork loin. But if you are inexperienced with cooking this particular cut of pork you may have some questions: How long do you grill pork loin per pound? What grilling techniques should I know about? With what shall I flavor the pork? We will address each of these questions and provide you with insightful tips that will help you make the perfect pork loin dinner for your family.
Outdoor Grill
How Long Do You Grill Pork Loin Per Pound?
Cooking Time -- The Short Answer
How Long Do You Grill Pork Loin Per Pound?
The complete answer to the cooking time is a little more involved than simply telling you an amount of time per pound and a temperature to cook this cut of pork and expect it to be done perfectly when the time is up. However, if you were to be given a fairly accurate short answer concerning the cooking time of a pork loin, it would be this: About 22 minutes per pound at about 350 degrees Fahrenheit.
Please understand that there is more to cooking a pork loin than simply pre-heating a grill or an oven to a certain temperature, set the timer, and expect excellent results. Please allow an explanation that will give a little more information before you run off and set the meat on the grill.
The Complete Grilling Procedure
The first thing to do, whether you are cooking on the outdoor grill or in the broiler oven, is to sear each side of the pork loin with high heat. Searing it will help keep in the moisture so you end up with a very tender and juicy cut of pork. Cook the pork loin on direct high heat for about two (2) or three (3) minutes on each side of the pork loin. Sear the lean side first, then the fat side. When turning any meat, do not use a fork as it will puncture the seared surfaces of the meat and allow moisture to escape easily. To preserve the moisture always use a pair of tongs to turn meat.
-- On the Grill:
I am among many Americans who love the taste of foods cooked on the outdoor grill. And what better meat to cook on the grill than a pork loin? Most people don't think of cooking a "pork roast" on the grill, and technically a pork loin is a pork roast. But because of its narrow thickness, it is the ideal "pork roast" to cook on the grill.
When grilling, there are common processes to follow regardless of which kind of grill you have.
1. Pre-heat the grill for searing.
2. When grilling on an outdoor grill, turn the meat often to simulate a rotisserie. A pork loin should be turned every few minutes to cook evenly and retain its moisture.
3. In order to preserve the moisture, always use tongs instead of a fork to turn meat.
4. Searing meat requires that it is exposed to direct high heat for two (2) or three (3) minutes on each side.
5. Pieces of meat, such as a pork loin, that are larger than chops or steaks should be cooked on low, indirect heat at around 350 degrees Fahrenheit. If your grill has vents in the lid, cook the pork with the vents open.
6. A meat thermometer should be used to ensure that the pork loin is between 160-170 degrees Fahrenheit on each end and in the middle. For pork 160 degrees Fahrenheit is medium well and 170 degrees Fahrenheit is well done. Below 160 degrees Fahrenheit you risk food poisoning or worm infection. It is best to check the temperature about 10-15 minutes prior to the completion time so you can make adjustments to the cooking time.
Once the pork has been seared on each side, follow these instructions for various types of grills...
• Charcoal Grill: Separate the charcoal into two (2) piles on either side of the grill to allow the pork loin to be laid between them.
• Gas Grill - Two Elements: Lay a piece of aluminum foil across the middle between the two elements and lay the pork loin on the aluminum foil. Cook on low heat.
• Gas Grill - Three or More Elements: Turn off the inner elements and allow only the outer two elements to cook on low heat. Lay the pork loin half way between the operating elements.
-- In the Broiler Oven:
In the cold weather of winter you may not want to do any outdoor grilling. When using a broiler oven you should follow similar procedures as grilling on an outdoor grill. Always use tongs instead of a fork to turn meat. And a meat thermometer should be used to be sure that the pork loin is between 160-170 degrees Fahrenheit on each end and in the middle. For pork 160 degrees Fahrenheit is medium well and 170 degrees Fahrenheit is well done. Below 160 degrees Fahrenheit you risk food poisoning or worm infection. It is best to check the temperature about 10-15 minutes prior to the completion time so you can make adjustments to the cooking time.
1. Pre-heat the broiler and broiling pan for 15 minutes. If your broiler has multiple heat setting, then set to high broil.
2. Set the pork loin on the broiling pan fat side up to sear for three (3) minutes.
3. Turn the pork to fat side down to sear for another three (3) minutes.
4. Turn off the broiler and turn on the oven. Bake in the oven at 350 degrees Fahrenheit on the broiling pan, fat side down, for the remainder of the time.
5. Make sure to check the inner temperature with the meat thermometer at both ends and in the middle about 15 minutes prior to completion of cooking time in order to avoid over cooking.
-- Rotisserie Oven:
Interestingly enough the pork loin will come out more tender and juicy when cooked in a rotisserie than either the outdoor grill or broiler oven. A meat thermometer should still be used to be sure that the pork loin is between 160-170 degrees Fahrenheit on each end and in the middle. For pork 160 degrees Fahrenheit is medium well and 170 degrees Fahrenheit is well done. Below 160 degrees Fahrenheit you risk food poisoning or worm infection. It is best to check the temperature about 10-15 minutes prior to the completion time so you can make adjustments to the cooking time.
Because the rotisserie cooks meat faster than either the outdoor grill or the broiler oven, you may need to reduce the cooking time to about 18 or 20 minutes per pound. It is still recommended to use a meat thermometer. However, because the rotisserie automatically sears all sides of the meat there is no need to sear the pork.
Let It Stand
For juicier, tenderer pork loin, when the pork loin has finished cooking let it stand at room temperature for 10-15 minutes before serving.
Flavor/Seasoning
A pork loin can be marinated in your favorite flavor marinade in the refrigerator overnight. You will likely find marinades at any supermarket. If you marinate in the refrigerator overnight, you'll need to puncture the meat several times to allow the marinade to soak into the meat. Follow the instructions on the package of marinade.
Many cooks prefer to use a dry seasoning rub. Seasoning your pork loin is as easy as liberally coating with season salt, garlic powder, and pepper, then rubbing the seasoning into the meat. You can also place the seasoned meat into a plastic bag and leave it in the refrigerator overnight.
There are also injection methods of marinating that would NOT require overnight marinating. In addition to injection marinating, there are also methods of injecting solid objects such as chopped garlic, chopped onions, or chopped pineapple.
If you prefer sweeter pork, apple sauce or apple butter (or even pineapple puree) can be injected into the meat of the pork loin. Or a slit can be made down the middle of the pork meat and the apple sauce or apple butter (or pineapple) can be inserted and the pork tied with string every one (1) or two (2) inches according to how you will cut the pork loin when it is done cooking.
Summery
In this article we have discussed the answers to questions such as: How long do you grill pork loin per pound? What grilling techniques should I know about? How shall I flavor the meat? If grilled properly a pork loin with all the trimmings will make a wonderful and delicious meal that your family will absolutely love.
How Long Do You Grill Pork Loin Per Pound?
Karel and friends build a brick bbq without any solid experience of the bbq building variety, but with enough computer skills to make a stop-frame animation ...


Keywords:
Bigger Is Better!
Outdoor Grill
The Weber Ranch Kettle Grill - Get The Ultimate BBQ Grill On Sale For Entertaining Big Crowds
It's hard to describe how big this grill is in words. If you haven't seen this grill in person, you are in for a surprise. The typical Weber grill surface is 22.5 inches in diameter, which is almost 400 square inches. The Weber Ranch grill is 37.5 inches wide, yielding you just over 1100 square inches of cooking surface.
The Weber Ranch Kettle Grill - Get The Ultimate BBQ Grill On Sale For Entertaining Big Crowds
With a grill this big, you can cook and entertain practically any size party and event. This grill was initially intended for caterers and outdoor chefs. But it is also useful for communities and organizations that may cook for local events and charities.
And you can certainly enjoy a Weber Ranch grill at home, which is great for a large household, and for hosting big parties with friends and family. Clearly this size grill is not for everyone. But if you often find yourself having to grill and barbeque your food in multiple batches due to space limitations, then this grill is your best solution.
And since it's a Weber, you are getting one of the highest-quality, leading grill brands that has been around for over 50 years. This grill is well-balanced and built very strong, which is critical. You certainly don't want a grill this big at risk of tipping over. But even with its size, you can comfortably move the grill around and position it where you need it. Plus there are two small "locking" casters on one side, securely anchoring the grill in place.
It also has a "lid-catcher" on the side, making the grill lid easy and safe to lift open and place it off to the side of the grill. Another helpful feature is the hinged cooking grate, which allows you to comfortably (and safely) add more charcoal when you need it.
Where Can I Buy A Weber Ranch Grill?
Finding this grill to buy locally can be challenging. I actually saw it once in our Ace Hardware store a few years back, and it certainly attracted everyone's attention. You can try looking in larger appliance specialty stores and outdoor specialty stores, such as the Great Escape or American Sale.
One other tip is you can sometimes find a good deal if you shop towards the end of the year when consumer demand for grills drops down dramatically. Plus, with as big as the Weber Ranch Kettle Grill is, any retail store that has them in stock late in the year will desperately be making room for their Winter and holiday items. You may even be able to negotiate a lower price with them at that point, too.
The Weber Ranch Kettle Grill - Get The Ultimate BBQ Grill On Sale For Entertaining Big Crowds
Watch as Chef Tony lays out the features of the Bull Brahma 5 Burner Gas Grill. Also Check out the great line of Bull outdoor kitchen accessories and product...
Tags:
In addition to the meat, you will need the following:
Outdoor Grill
How To Cook BBQ Ribs On Your Outdoor Grill
Store bought or homemade dry rub Barbeque sauce Basting brush Tongs to turn meat
How To Cook BBQ Ribs On Your Outdoor Grill
To parboil or not to parboil
Parboiling, or leaching as it is also called is when you partially cook a food, either by baking it in the oven or boiling it in water to help speed the cooking process up. Some people cook meat through this process first so that they do not have to keep it on the grill for a longer time, which would dry the meat out. Do this for approximately 45 minutes.
If you decide to parboil, you can add a can of beer to your water or to the pan that you bake the meat in to add flavor.
Seasoning
Once your meat is parboiled, you can let it cool down enough to handle them without burning yourself. Using a store bought dry rub or one that you have mixed yourself; cover your ribs generously with seasoning on both sides. A dry rub is a combination of herbs and spices that you rub into the meat of so that the flavor penetrates deeply.
Preparing the Grill
Before you begin cooking your meat on the grill, be sure to heat the grill up. If you have a temperature gauge on the grill set it to 350 degrees or watch it until it reaches 350. If you do not have a temperature gauge, you will want to get the grill hot enough so that when you spray water onto it, that it instantly sizzles and evaporates.
Grilling
Although you are making barbeque, you do not want to put your sauce on at this point. Now that your grill is ready and your ribs are seasoned, you can place them onto the highest rack of the grill. Keeping it higher and further away from the heat will allow the ribs to cook evenly and slowly so that they do not dry out and become overcooked. Keep your grill lid closed and cook for 30 minutes bone side down. At that point, turn them over and cook them for another 15 minutes.
Sauce it up
Now that they are finished, move them down to the lowest rack of the grill. Here is the fun part. Add the barbeque sauce of your choice. It is best to pour some on and spread it out with a basting brush used for spreading sauce on food. Never leave the grill unattended during this time. The sauce may cause flare-ups of the flame. Cover with sauce completely and flip the ribs regularly for approximately 10 minutes. This allows the sauce to stick and become caramelized.
How To Cook BBQ Ribs On Your Outdoor Grill
http://disc-it.com/free Cook outdoors with your custom outdoor grill. The disc-it is fully customizable with over 300 patterns. We can make any pattern for y...
Keywords:
The George Foreman ggr50b Indoor Outdoor Grill makes grilling a breeze! The grill is very straightforward to put together and can be placed either directly on a tabletop or on its pedestal. Just plug it in and leave about 10 minutes to fully pre-heat the surface. No more waiting ages for a barbeque to heat up! This will give you time to put the finishing touches to whatever you are going to grill-steaks, fish, burgers, chicken or kebabs. The electric heat has is very adjustable and goes from low (for keeping food warm) to high (for searing steaks).
Outdoor Grill
George Foreman Ggr50b Indoor Outdoor Grill - Inside Or Outside, The Choice Is Yours!
The grill surface is non- stick and, apart from the obvious benefits means that you don't have to smother the food in fat. The center channel drains fat into large grease tray so your food not only tastes great but is super healthy when it is done. The high domed and vented lid helps create a circular flow of hot air to ensure even cooking-particularly important for a large roast or whole chicken.
George Foreman Ggr50b Indoor Outdoor Grill - Inside Or Outside, The Choice Is Yours!
The "Clean up" can put a dampner on any dinner but cleaning the George Foreman ggr50b Indoor Outdoor Grill is so easy. The non-stick grill surface washes easily with hot water and dish soap-just like cleaning a big oily plate in the sink, in fact!
George Foreman Ggr50b Indoor Outdoor Grill - Inside Or Outside, The Choice Is Yours!