George Foreman GGR50B Indoor/Outdoor Grill

George Foreman GGR50B Indoor/Outdoor Grill
Click to See More Detail


Monday, April 29, 2013

How to body an alfresco kitchen Building an alfresco kitchen

How to body an alfresco kitchen Building an alfresco kitchen


Click Here FLV MPlayer - Free Download

Tube. Duration : 1.07 Mins.


How to body an alfresco kitchen Building an alfresco kitchen


How to build an outdoor kitchen 303-255-5554 Building an outdoor kitchen http://www.patioandhomeimprovementdesign.com How to build an outdoor kitchen. We are...

How to body an alfresco kitchen Building an alfresco kitchen

How to body an alfresco kitchen Building an alfresco kitchen


How to body an alfresco kitchen Building an alfresco kitchen

How to body an alfresco kitchen Building an alfresco kitchen

No URL How to body an alfresco kitchen Building an alfresco kitchen

Prefab Outdoor Kitchen Islands - The Perfect Way to Enjoy the Great Outdoors


ItemTitle

Prefab outdoor kitchen islands are the practical choice in building the perfect outdoor kitchen possible. For most homeowners, outdoor kitchens give a more unique and enjoyable outdoor experience that they could readily share with their guests and loved ones. Despite the quite expensive cost, the benefits of prefab kitchen islands are still far greater than its disadvantages.

Prefab Outdoor Kitchen Islands - The Perfect Way to Enjoy the Great Outdoors

Outdoor Grill


People love prefab kitchen islands (a.k.a. outdoor grill islands) because it has all the built-in amenities that are normally present in an indoor kitchen. Unlike the traditional gas grill, you don't have to constantly go in and out of your house just to get the supplies you need in cooking. With prefab outdoor kitchen grill islands, you already get to enjoy spacious countertops, cabinets, kitchen drawers, built-in kitchen appliances, kitchen faucets and sink - other features could also be added depending on your budget.


Outdoor Grill

Prefab Outdoor Kitchen Islands - The Perfect Way to Enjoy the Great Outdoors


There are different sizes, shapes, colors, and designs that you can choose for your ideal prefabricated outdoor islands. For example, the shapes are available in a half-moon, L-shaped, and rectangular structures.


Prefab Outdoor Kitchen Islands - The Perfect Way to Enjoy the Great Outdoors

To add more charm and value to your outdoor kitchen, you could place bar stools along your countertops so that the guests could gather around while you cook for them. Outdoor path lighting could also be mounted on the ground to guide your guests towards the outdoor kitchen spot. Placing nearby one or two outdoor fireplaces is a great idea to keep warm and cozy on days that the weather is a bit colder.

The reason that makes a prefab grill island so great is simply because it is pre-made. You don't have to wait for weeks just to enjoy its benefits. Upon its delivery at your doorstep, all you have to do is to choose the perfect spot and connect the necessary utility lines, such as electric, water and gas lines - and you can finish this roughly within a day.

Going back to the electric and gas utility lines, the usual electricity requirement for outdoor kitchens is 40 and up amps while the gas requirement is above 100, 000 BTUs (British Thermal Units).

As a rule of thumb, the more elaborate the design and features the more expensive prefab outdoor islands could become. If you're planning to purchase one in the future, you need to prepare at least ,000 to ,000, which could exclude utility expenses. So, make sure that you buy only from trusted brands (e.g. Fire Magic, Texas Barbeque, and Lynx) to guarantee that you only get the best from your investment.

There are so much more to discover about the contrasting designs and benefits that prefabricated outdoor grill islands could offer. To get started with your project, you can browse through many online kitchen shops for the best deals available. They even post on their websites great kitchen design ideas and brand recommendations for your prefab outdoor kitchen islands.


Prefab Outdoor Kitchen Islands - The Perfect Way to Enjoy the Great Outdoors


How to build an outdoor kitchen 303-255-5554 Building an outdoor kitchen http://www.patioandhomeimprovementdesign.com How to build an outdoor kitchen. We are...


Keywords:

Sunday, April 28, 2013

How to Build an Outdoor Grill

How to Build an Outdoor Grill


ItemTitle

Building an outdoor grill is an easy weekend project. Outdoor grills add style and function to any backyard deck or patio. With just a little bit of pre-planning it's easy to learn how to build an outdoor grill in ten easy steps.

How to Build an Outdoor Grill

Outdoor Grill


Step 1: Learning how to build an outdoor grill, like with any other home improvement project begins with gathering materials for the project. All you need are a few bricks, a grill grate, and some sand.


Outdoor Grill

How to Build an Outdoor Grill


Step 2: Find the right spot for the outdoor grill. The base needs to be perfectly level. If there are any bumps dips or ruts the grill won't sit flush and could collapse.


How to Build an Outdoor Grill

Step 3: If you're putting the grill on a concrete pad such as your patio deck then all you need to do is start stacking up the bricks. If however you plan on locating the outdoor grill somewhere in your yard, you will need to remove the top layer of grass and dig a footing several inches deep. Then tamp down the loose dirt to ensure the outdoor grill has a steady foundation. What you will shoot for is a 3-foot by 3-foot square. Arrange the bricks along the bottom layer. Making sure they all sit flat against the floor.

Step 4: Keep stacking bricks on top of the bottom layer until they are about 3 feet high. You should now have a 3-foot by 3 foot by 3-foot cube.

Step 5: After you have built the base up to 3 feet high do a shake test. Gently shake the grill. If it's well built then it shouldn't wobble at all. If it does wobble however find where the problem is and redo the bricks until the grill feels sturdy.

Step 6: Start building the firebox. Instead of bricking in the whole base here you are looking to create space. Simply lay a single row of bricks along 3 sides of the grill. You want a 14-18 inch high wall.

Step 7: Grab the bag of sand and shake it inside the firebox. The goal here is to fill any cracks between the bricks so you have a nice flat surface for pouring in the coals.

Step 8: Sweep out any excess sand. After all the cracks are filled and everything is flush, sweep out any excess sand so that the grill has a nice uniform appearance.

Step 9: Place the grill grate on top of the wall firebox. Make sure that the grill grate is safely supported. If it does not sit flush with the bricks it could fall into the glowing coals. Safety first!

Step 10: Once again check for wobble. If the grill is sitting sturdy it's time to break out the briquettes and brisket, grab the family and barbeque.

There you have it, how to build an outdoor grill in ten easy steps. It's an easy afternoon project that pays for itself in increased home value as well as evening enjoyment!


How to Build an Outdoor Grill


Thursday, April 25, 2013

Things You Can Do With a Rotisserie Grill Burner

Things You Can Do With a Rotisserie Grill Burner


ItemTitle

You will be impressed by what you can do with a rotisserie grill burner. It is an extra burner or attachment to a grill which enables you to cook food on a rotating spit. You can add a rotisserie skewer alone to a charcoal or gas grill, but a burner attachment is a different thing. A rotisserie grill burner is a dedicated burner, either gas-fired or infrared, usually set up in the back or sides of the grill. Many brands of grills have rotisserie attachments designed for specific models, and there are also the kind which have a universal design to fit on any brand.

Things You Can Do With a Rotisserie Grill Burner

Outdoor Grill


Roasting food on a spit requires low temperatures and time. The goal is to sear the outside and seal in the juices. In order not to burn the food, you want the heat source to be indirect. In charcoal grills, the coals are moved to one side of the pan once they are ready and hot, and replenished every half hour or so. Gas grills either have dedicated burners or temperature adjustments along with a barrier between the flame and the food. Infrared rotisserie grill burners are usually located in the back of the grill. The infrared heat source cannot be used at the same time as the gas heat source.


Outdoor Grill

Things You Can Do With a Rotisserie Grill Burner


Whichever kind you choose, you will want to use a drip tray beneath the food as it cooks, which will keep the grill clean and provide basting juices or drippings for gravy, as well as preventing flare-ups and burnt food when used with charcoal or gas flames. Selecting the best one will depend on the kind of grill you use, and also the kinds of food you want to cook.


Things You Can Do With a Rotisserie Grill Burner

There are all kinds of things you can do with a rotisserie grill burner. You've seen those ready-to-eat whole chickens in grocery stores and food markets. With your own grill and dedicated rotisserie burner, you can duplicate those chickens and create your own specialty flavors at half the price. Chicken is not all--if a food can be cooked on a spit, it can be cooked with a rotisserie grill burner. Think of pork loin, roast beef, boneless leg of lamb, small turkeys, and even duck and goose! The only limitation would be the size of the grill and the power of the rotisserie motor.

You can also cook whole fish, butterflied chops, ribs, or other food that does not skewer well in rotisserie baskets so that it benefits from the even cooking that constant rotation provides. This is a convenient and flavorful way to cook that you can take advantage of, now that you know what you can do with a rotisserie grill burner.


Things You Can Do With a Rotisserie Grill Burner


Wednesday, April 24, 2013

How to set up your Gas Grill To Simulate A Stone Pizza Oven

How to set up your Gas Grill To Simulate A Stone Pizza Oven


Click Here FLV MPlayer - Free Download

Video Clips. Duration : 1.95 Mins.


How to set up your Gas Grill To Simulate A Stone Pizza Oven


Chef Tony shows you how to convert you gas grill to perform similarly to a wood fired stone oven. Begin by removing the 2 outer cooking grids from your grill...

How to set up your Gas Grill To Simulate A Stone Pizza Oven

How to set up your Gas Grill To Simulate A Stone Pizza Oven


How to set up your Gas Grill To Simulate A Stone Pizza Oven

How to set up your Gas Grill To Simulate A Stone Pizza Oven

No URL How to set up your Gas Grill To Simulate A Stone Pizza Oven

Panini Grill Sandwich Recipes


ItemTitle

You do not have to have a specialty panini sandwich maker to make great and authentic tasting panini grill sandwiches; you can make them on your outdoor gas or charcoal grill or indoors with your George Foreman grill or even on a griddle or in a skillet. The secret to making a great panini is a bit of pressure while cooking and your panini grill sandwich recipes.

Panini Grill Sandwich Recipes

Outdoor Grill

Homes for Sale - 1630 Woodhall Way 11-07, Geneva, WI


Click Here FLV MPlayer - Free Download

Video Clips. Duration : 1.50 Mins.


Homes for Sale - 1630 Woodhall Way 11-07, Geneva, WI


Property Site: http://tour.circlepix.com/ZKFMN7 Looking for the perfect location, wooded lot, natural water running stream with wildlife topped with a golf c...

Homes for Sale - 1630 Woodhall Way 11-07, Geneva, WI

Homes for Sale - 1630 Woodhall Way 11-07, Geneva, WI


Homes for Sale - 1630 Woodhall Way 11-07, Geneva, WI

Homes for Sale - 1630 Woodhall Way 11-07, Geneva, WI

No URL Homes for Sale - 1630 Woodhall Way 11-07, Geneva, WI

Grilling Ham on the Grill


ItemTitle

Pork has been celebrated as a special occasion food for centuries. Coined "the other white meat" pork is as versatile as chicken, and some may say even tastier. A method of cooking pork which is becoming more popular is on the grill. Grilled pork is more convenient than using the frying pans of ovens, and grilled food has an unmistakable smoky flavor that people seem to love. Contrary to popular belief, you don't have to be a grilling pro to pull off great tasting pork recipes. All you need is a little patience to make your next meal spectacular.

Grilling Ham on the Grill

Outdoor Grill


I love smoked hams. They come pre-cooked and are already packed full of flavor. I've experimented around with different flavor combinations until I found one that I really loved. Then I decided to move it to the grill. I was astonished by the results. I fire up my gas grill every Christmas Eve and Easter and make this recipe. Pineapple and brown sugar glazed ham with orange Dijon-honey sauce.


Outdoor Grill

Grilling Ham on the Grill


Grilled and Glazed Ham:


Grilling Ham on the Grill

You may want to make this recipe when hams go on sale. They can be rather expensive. While we're at the store, we'll want to grab a few items for this. First, get a nice smoked ham; I like the butt portion as opposed to the shank. It's meatier with less fat. Next, grab some pineapple juice, orange juice, Dijon mustard and some honey.

We're going to make the glaze for the ham first. In a medium sauce pan, pour in 2 cups of pineapple juice with ½ cup of brown sugar. Bring these ingredients to a boil and cut the heat back to medium and let it cook down until it's reduced by half. It will start to look thick, almost like syrup. In another pan, we want to make the sauce for the ham to pour over once it's cooked and sliced. Add 2 cups of orange juice and reduce that down just like the pineapple juice. When it's reduced down to ¾ to 1 cup, add 2 tablespoons of Dijon and 2 tablespoons of honey and combine well. Kill the heat and set aside.

There's not much preparation for the ham, just cut one burner of your grill on to medium low heat. We want to place the ham on the opposite side of the grill to cook with an indirect method. Place the ham, flat side down, on the opposite side of the grill, cover very loosely with foil and close the lid. Don't stray too far away from the grill, but you don't have to babysit either. This ham will cook for 2 hours before we begin to glaze.

After the 2 hours, we want to turn the heat up to medium and glaze the ham thoroughly. Using a clean, preferably new and unused paintbrush does a great job. After you glaze the ham, close the lid and return every 15 minutes to glaze again. In another 2 hours of glazing, we will have developed an awesome crust on the ham. Almost like a glossy candy-coat.

Be careful taking the ham off. Make sure to let it rest at least 20 minutes before cutting into it. Leave it sitting flat as it cooked and slicing will be that much easier. Drizzle a bit of the orange Dijon-honey sauce over and enjoy all the wonderful flavors. It's smoky, sweet and savory. It's a huge hit at my place. We have it twice every year, at least.


Grilling Ham on the Grill


Property Site: http://tour.circlepix.com/ZKFMN7 Looking for the perfect location, wooded lot, natural water running stream with wildlife topped with a golf c...


Keywords:


A panini sandwich is made with the filling placed between the two slices of bread that is grilled very quickly and the sandwich is pressed together tightly while it is being cooked. This pressure causes the ingredients to meld into a more delicious combination and because this is all done with high heat, it also results in a crispier outside, too. And that is why panini are so popular, the combination of super flavorful and a bit of crunch in the crust. When you look for panini grill sandwich recipes, you'll find endless variations, but the best ones will consist of thinly sliced meat or fish, grated or thinly sliced cheese and everything will be as fresh as possible.


Outdoor Grill

Panini Grill Sandwich Recipes


The bread is another important choice in selecting a panini grill sandwich recipe. The bread you use should be hearty, not light and airy. Ciabatta bread or focaccia are the traditional Italian choices, but any dense bread, especially an herbed bread, is a good choice. Make sure it is flat so that it grills evenly.


Panini Grill Sandwich Recipes

Your choices for fillings are as varied and interesting as you'd like them to be. When choosing meats you will want them to be precooked or cured as the grilling process is meant to heat the sandwich, not cook the fillings. Favorite meat choices include prosciutto, salami, roast beef, chicken, turkey or pastrami. Thinly sliced salmon is a wonderful choice, smoked makes a delicious sandwich and using last night's leftover grilled fish is sublime. The smoky flavor from grilling is tailor made for the flavor melding that panini are known for. Look for panini grill sandwich recipes that use the flavor melding to its fullest.

Most panini grill sandwich recipes will tell you to use a specialty panini grill. While it is nice to use the proper equipment to make these sandwiches, if you don't have one and can't get one, don't despair. You can make a panini sandwich on your outdoor grill; this is a great choice for adding flavor through a cooking method as well as ingredient choice. You can also use a two surface grill such as a George Foreman grill or even a skillet or griddle. If you have a waffle maker, that will work, too. The key is to make sure you preheat the surface well and apply pressure to the sandwich while cooking. If you are using a grill or skillet you can use a foil wrapped brick or a pie pan filled with rocks or sand, or you can just press the sandwich firmly with your spatula.

There are many options for panini grill sandwich recipes, but the simplest and the tastiest panini grill sandwich recipes are the ones you come up with yourself. Your family will appreciate the personal touch and you'll want to make them again and again.


Panini Grill Sandwich Recipes


Chef Tony shows you how to convert you gas grill to perform similarly to a wood fired stone oven. Begin by removing the 2 outer cooking grids from your grill...


Keywords:

Monday, April 22, 2013

Three Steps to Cooking Perfect Steak on Your Outdoor BBQ Grill

Three Steps to Cooking Perfect Steak on Your Outdoor BBQ Grill


ItemTitle

If you're like me, When you crank up that BBQ grill for the season it's all about cooking perfect steak. I love all kinds of foods cooked on an outside bbq grill, but none says summer quite like that sweet smell of steak on the grill. For me, the results are always predictable and always pretty close to perfect. This is because I use the same process every time and I start with the end result in mind. So that's my first tip: cooking perfect steak starts with identifying what that means to you and then learning about the basic cooking method so that you can navigate to that desired point. You'll have to decide on the definition of perfection for yourself - that's the fun part. But the next few paragraphs should help with the second part - learning the process and the basic cooking method that helps get you to your perfection.

Three Steps to Cooking Perfect Steak on Your Outdoor BBQ Grill

Outdoor Grill

20 Lido Road, Winter Spgs, FL 32708


Click Here FLV MPlayer - Free Download

Video Clips. Duration : 4.20 Mins.


20 Lido Road, Winter Spgs, FL 32708


www.tourfactory.com/986729/r_www.youtube.com 20 Lido Road Winter Spgs, FL 32708 Contact Diane Sterling P.A. for more information. Keller Williams 407-761-051...

20 Lido Road, Winter Spgs, FL 32708

20 Lido Road, Winter Spgs, FL 32708


20 Lido Road, Winter Spgs, FL 32708

20 Lido Road, Winter Spgs, FL 32708

No URL 20 Lido Road, Winter Spgs, FL 32708

Sunbeam Grills Are No Longer Being Made - Find Out How to Keep Your Favorite GrillMaster Running Hot


ItemTitle

GrillMaster Grills were a series of excellent outdoor gas grills that were made by the Sunbeam company and sold throughout the United States.

Sunbeam Grills Are No Longer Being Made - Find Out How to Keep Your Favorite GrillMaster Running Hot

Outdoor Grill

9,000 4BR/5BA - Tucson, AZ - 5141 E Oakmont Drive


Click Here FLV MPlayer - Free Download

Tube. Duration : 0.53 Mins.


9,000 4BR/5BA - Tucson, AZ - 5141 E Oakmont Drive


Tucson Homes for Sale and Real Estate Open House 04-28-2013 from: 1PM to: 4PM 9000 4 bedrooms, 5 baths 5141 E Oakmont Drive Tucson, AZ 85718 MLS #: 21230...

9,000 4BR/5BA - Tucson, AZ - 5141 E Oakmont Drive

9,000 4BR/5BA - Tucson, AZ - 5141 E Oakmont Drive


9,000 4BR/5BA - Tucson, AZ - 5141 E Oakmont Drive

9,000 4BR/5BA - Tucson, AZ - 5141 E Oakmont Drive

No URL 9,000 4BR/5BA - Tucson, AZ - 5141 E Oakmont Drive

Barbecue Cooking Tips - Indirect Heat Grilling For Perfectly Done Outdoor Roasts


ItemTitle

The spring and summer months are a great time to pull the old grill out of the garage, dust it off and start planning some delicious barbecue dishes.

Barbecue Cooking Tips - Indirect Heat Grilling For Perfectly Done Outdoor Roasts

Outdoor Grill

Beacon Star 30 inch Outdoor Coffee Table with Integral Fire Pit and Chromed BBQ Grill - UK


Click Here FLV MPlayer - Free Download

Tube. Duration : 1.00 Mins.


Beacon Star 30 inch Outdoor Coffee Table with Integral Fire Pit and Chromed BBQ Grill - UK


http://www.amazon.co.uk/gp/product/B00193GGLY/ref=as_li_ss_tl?ie=UTF8&tag=barbecuesathomechannel-21&linkCode=as2&camp=1634&creative=19450&creativeASIN=B00193...

Beacon Star 30 inch Outdoor Coffee Table with Integral Fire Pit and Chromed BBQ Grill - UK

Beacon Star 30 inch Outdoor Coffee Table with Integral Fire Pit and Chromed BBQ Grill - UK


Beacon Star 30 inch Outdoor Coffee Table with Integral Fire Pit and Chromed BBQ Grill - UK

Beacon Star 30 inch Outdoor Coffee Table with Integral Fire Pit and Chromed BBQ Grill - UK

No URL Beacon Star 30 inch Outdoor Coffee Table with Integral Fire Pit and Chromed BBQ Grill - UK


http://www.amazon.co.uk/gp/product/B00193GGLY/ref=as_li_ss_tl?ie=UTF8&tag=barbecuesathomechannel-21&linkCode=as2&camp=1634&creative=19450&creativeASIN=B00193...


Tags:


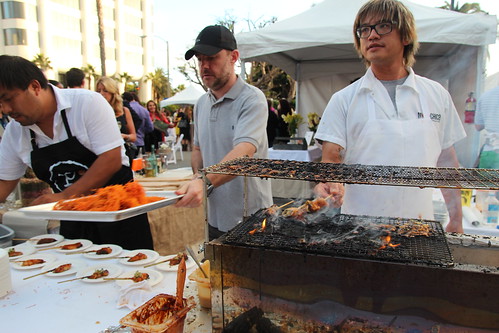
Most of us know how to make basic grilled foods like burgers, hot dogs, steaks and sausages. These are generally cooked by the most basic form of grill cooking, direct heat cooking. Direct heat grilling means that the food is directly over your heat source (hot coals or gas burners) and cooks from this direct heat. Direct heat is perfect for smaller food items that you want to quickly sear the outside, producing that beautiful browned caramelization on the surface, while sealing in the juicy freshness of the inside. It is the ideal cooking style for steak which is nice and browned on the outside yet pink and juicy on the inside.
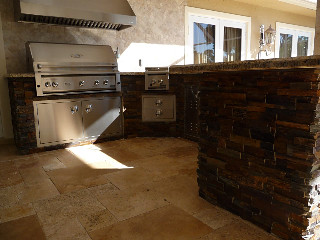

Outdoor Grill

Barbecue Cooking Tips - Indirect Heat Grilling For Perfectly Done Outdoor Roasts


However, what many grilling neophytes don't know is that direct heat is not the only way to cook on a barbecue! Another important style of cooking is indirect heat grilling. Indirect heat relies on a heat source which is not directly next to or beneath the grilling food, but is rather separated by some distance. With the lid closed on your barbecue, this gentler form of heat cooks the food by convection of ambient heat in the hot air and smoke within your grill, rather than by direct radiant heat from the coals. This is similar to the way food cooks in your oven when roasting, except without the wood smoke!


Barbecue Cooking Tips - Indirect Heat Grilling For Perfectly Done Outdoor Roasts

So why should you learn how to cook with indirect heat? What is it good for? Well, if you tried to grill a whole chicken with direct heat over very hot coals, the surface skin and fat would be burnt to a crispy, black char long before the interior was fully cooked. Also, by the time the middle was cooked, the flesh would be dried out. You would loose the surface flavors and juicy interior of a well roasted chicken. So the solution? You guessed it, indirect heat. Indirect heat allows your larger cuts of meat to cook slowly, developing the outer brown color more slowly while allowing the interior to cook to perfect doneness. A perfect rack of ribs requires the meat to cook slowly until the meat is tender and almost falling off the bone. A chicken should cook completely while the exterior does not char. All this and more can be accomplished with indirect heat.

So how do you do it? Lets find out!
For starters, you will need a couple of things to help make your indirect grilling perfect (you can do without them, but they are helpful: A shallow metal pan or dish half-filled with tap water A meat thermometer A grill thermometer (if your grill doesn't have one built-in)Start your charcoal or gas burners as you normally would. 
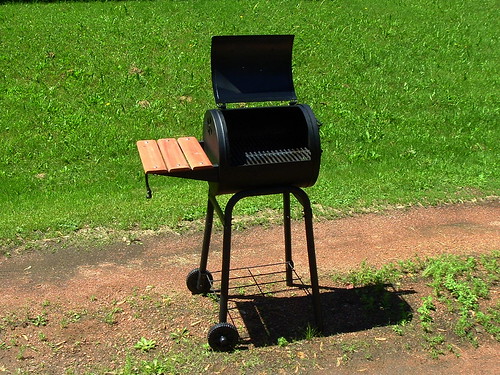
If you are using charcoal, when your charcoal is all hot and ready (when the briquets have a layer of grey ash over them), separate the coals onto the two sides of your grill. You will have two piles of coals on either side of your grill with a large empty space in the middle. Weber and other companies make indirect grilling coal holders just for this purpose which are basically metal baskets that hold charcoal on either side of your grill. However, you can do without any special equipment. If you are using a gas grill, you can use indirect heat by turning off one of your burners to have a less hot spot on your grill. Ideally, if you have three burners, you would turn off the middle one, leaving the two side ones on. If you only have two burners, turn on on and leave the other off. Place the metal pan with water in it in the middle of your charcoal grate, between the two piles of charcoal (on on the turned off burner if you have a gas grill). This will catch drippings from your roasting meat and will also help keep the interior of your grill humidified so that your meat doesn't dry out. Put your grill grate on. Close the lid of your grill and let the heat accumulate. Use your grill thermometer to check the temperature inside your close grill to make sure there is adequate heat. If it is not warming up, either add more coals and wait for them to start burning or turn up your burners if you have a gas grill Open your grill and place your prepared food (whole chicken, ribs, roast, etc.) in the "indirect heat zone" of your grill. This is the open area, under which there are no coals or gas burners burning. Close the lid and let your food roast. Check back periodically and flip your meat over or rotate it occasionally. Also check that there is still adequate heat in your barbecue. Baste your meat regularly when the surface dries out to keep it moist, about every 15 minutes. If the surface of your meat looks like it is browning too fast in any one area, be sure to turn or flip it so that all sides get equal heat and exposure. If it still seems like the surface is cooking too fast, your heat may be too high or the roast is getting too much direct heat from one of the heat sources. Attempt to move the charcoal away further or move the roast to a more isolated spot on the grill. Always remember to keep the cover of your grill closed between checking on your food. You want to keep all that good heat inside to help roast your meat! When your roast is looking like it may be done, begin testing for doneness. The most accurate way to do this is with a meat thermometer inserted into the thickest part of the meat (on a chicken this is the deepest part of the inner thigh meat or deep in the breast). Do not put your thermometer up against bone as this can artificially increase the temperature reading. Most thermometers have readings for doneness for beef, pork, and chicken. If yours does not, general rules to go by for chicken is 165 degrees, pork 160 - 170 degrees, beef/lamb/veal 145 for medium rare, 160 for medium and 170 for well done. If you do not have a meat thermometer, you can prick the meat deeply with a skewer or fork. If pork and chicken are done adequately, the fluid that runs out should be clear, not red or pink. If all else fails, cut a small slice into a deep part of meat to check the color. When your food has reached its ideal level of interior doneness, remove from the grill and place on a large platter or plate. Cover with tin foil and let your roast sit for 5 to 10 minutes at least so that the interior juices and heat redistributes. Carve and serve!
A few other tips to make your indirect heat grilled foods shine!
Marinating - Because grilling is a dry heat that can have the tendency to dry out meats that are cooked for a long time, marinating your food before cooking is a great way to both add savory flavors as well as increase the juiciness. There are many recipes for delicious marinades for poultry, pork and beef and even many bottled marinades available in supermarkets. Another option similar to marinating is brining which really seals in and concentrates flavors. Basting - I strongly recommend basting your meat as it cooks over indirect heat. When the surface dries out, every 15 minutes or so during the cooking time, baste it generously with a basting brush. The basting mixture can be similar to the marinating mixture or alternatively it can introduce new flavors. For example, barbecue sauce is not good to marinate with, it will just burn on the meat if it cooks too long. However, introduced later in the cooking process to baste the meat a few times before it is done creates a great, savory coating of flavor. Other great options for marinating include lemon juice, olive oil, and red wine vinegar, either together or alone. Again, there are many recipes with recommendations for basting mixtures for your slow roasted grilled foods. For safety, if you baste with your marinade, remember that your marinade came in contact with your raw meat. Therefore, avoid adding this mixture in the last 15 to 20 minutes of cooking so you don't introduce any uncooked meat to the surface of your roast! Its best to use a fresh basting mixture if possible. Well that's it! A quick and complete primer to indirect grilling. I think you will find that it brings your barbecue cooking to a whole new level, making your roasts more tender and juicier.


Barbecue Cooking Tips - Indirect Heat Grilling For Perfectly Done Outdoor Roasts


Tucson Homes for Sale and Real Estate Open House 04-28-2013 from: 1PM to: 4PM 9000 4 bedrooms, 5 baths 5141 E Oakmont Drive Tucson, AZ 85718 MLS #: 21230...


Keywords:


They are a beloved patio accessory for many families and have ably handled the outdoor cooking and grilling for many years.


Outdoor Grill

Sunbeam Grills Are No Longer Being Made - Find Out How to Keep Your Favorite GrillMaster Running Hot


But lately you may have noticed that they are becoming rarer and rarer.


Sunbeam Grills Are No Longer Being Made - Find Out How to Keep Your Favorite GrillMaster Running Hot

You are not imagining things.

Sunbeam stopped producing Grillmaster Grills in March of 2003.

But if you have a GrillMaster that you still use and want to keep on using - you are in luck. There are replacement parts for Sunbeam grills available through many online retailers. Thousands of parts are available for almost every models, so chances are good that you can find the one you need.

Gas Grill Wear Out

Even if you take excellent care of your gas barbecue grill, clean it every time and store it indoors, parts are still going to wear out from use and require replacement parts. And unlike a cheap charcoal grill, it is frequently far less expensive to repair or replace a part in a gas grill than it is to buy a whole new grill.

Gas grill burners will always rust with age due to there design and materials. Even stainless steel gas grill burners will wear out and even rust in time.

Your Sunbeam grilling accessories can also wear out and need replacing. These include the grates, heat shield, heat tent, flame tamer, and I-tent.

Rust, grease and drippings can also stick to the surfaces and cause flare-ups.


Sunbeam Grills Are No Longer Being Made - Find Out How to Keep Your Favorite GrillMaster Running Hot


www.tourfactory.com/986729/r_www.youtube.com 20 Lido Road Winter Spgs, FL 32708 Contact Diane Sterling P.A. for more information. Keller Williams 407-761-051...


Keywords:


It All Starts BEFORE Cooking Tenderloin!


Outdoor Grill

Three Steps to Cooking Perfect Steak on Your Outdoor BBQ Grill


For most carnivores, the beginning of the process towards steak nirvana is when you actually start cooking tenderloin. Unfortunately, this approach leaves out one of my best secrets for cooking perfect steak: start with the whole tenderloin. There are so many advantages to buying a whole tenderloin and breaking it down yourself. You can definitely save some money learning how to do this, and it is a lot easier than you think. When you buy the whole tenderloin, the first thing you have to do before cooking tenderloin is to remove the "chain". The chain is the side muscle; it contains a lot of the fat and is great for use later in stews, chilis or even my favorite treat: Tenderloin Philly cheese steak. But that's a whole other way for cooking tenderloin and beyond the scope of this article! Once you've removed the chain, you must remove the thick top end of the tenderloin - "the head". This, too can be set aside and used later. What you are left with is a long tenderloin from which to cut your steaks. The most important thing to remember is to try to cut the steaks of consistent size by weight. Consistent size equals consistent cooking, which equals reliable cooking! Use a scale and aim for a consistent size somewhere between 3 and 5 oz per steak, depending on who you're cooking for.


Three Steps to Cooking Perfect Steak on Your Outdoor BBQ Grill

Do you Really Know How to Grill Beef?

If you believe most people, grilling takes no skill at all. It's so much easier than cooking and anyone can do this with little advance planning or common knowledge. Right? This is actually one of my favorite cooking myths! Knowing correctly how to grill beef (or anything else) is essential to outdoor cooking success. Grilling is direct source conductive heat. Cooking is to grilling as driving is to flying a rocket ship. Everything happens quickly and intensely with grilling and that includes mistakes. So, let's begin with the simple process:

First, get the grill as hot as possible. Keep the lid down while heating the grill, but open when cooking. This is another common grilling mistake. If you close the lid while cooking, the method you are applying is similar to that of oven cooking. Why bother doing it outside on the grill? Brush the steak with olive oil and season with salt and pepper. You can use any other kind of seasoning or rub here, but I find that the true steak flavor comes from a good cut of meat and you don't need anything else. You might have a different opinion so season as you see fit. Place the steak on the hot grill "show side" down - meaning the side you'd want to display on the plate goes down on the grill first. Now observe for signs of done-ness. When the steak is 75% done on one side, flip it over and cook the rest of the way.

Knowing how to grill beef is a simple process, but most people still go into it blindly. By following the steps, you will always be working towards cooking the perfect steak, rather than just cooking a steak until it has reached a safe to eat temperature and texture. The fine line of difference between acceptable and perfection make all of the difference, and with perfection so reliably reachable, why not aim high?

How Long Should the Meat Cook? Until It's Done!

So, here we are. We always arrive at the same question. In travel, it's: are we there yet?; and in cooking, it's: how long should the meat cook?. Well, I have one answer to all of the how long questions: until it's done. Yes, it really is that simple. Let the meat cook until it's done. And now we get into the more interesting question: how do I know when it's done? I often say that cooking is a journey - so you are a tourist, an observer on that journey. As you observe what happens to the steak during the cooking process, you will notice some predictable things happen. First, at 165 degrees, proteins coagulate. What you will see when this happens is that the steak will stiffen and shrink. You will see the sides of the tenderloin start to get brownish gray. At 320 degrees, the sugars caramelize. If you lift a side of the steak up slightly and look underneath, you will see the formation of grill marks to indicate this is happening. You will also begin to smell that nice, sweet, smell - telling you that you are cooking perfect steak and all is happening as it should. When the steak is 50-75% cooked on one side, it reaches what is termed in French culinary as "a point". You will observe the juices start to bubble up to the red top. This indicates it is time to flip the steak, allowing it to finish its cooking on the other side. The last observation you will make to determine done-ness is the most quantitative because you will use a thermometer. Don't cut open your steak to peer into the middle! Don't stab at it with a fork! Both of these activities will release all of the juiciness you just worked so hard to achieve! 125-135 degrees is rare; 145-150 is medium and 160-165 is well done. So pick your temperature and remove the steak from the grill. But before serving it, let it rest for 5-10 minutes so that the juices can redistribute and run off onto the non-serving plate.

Just by understanding these simple facts about grilling, cooking perfect steak is almost a guaranteed result. Go ahead and get your own whole tenderloin today and get ready for some great outdoor eating!


Three Steps to Cooking Perfect Steak on Your Outdoor BBQ Grill


Sunday, April 21, 2013

for auction - 8309 Crestridge Road, Fairfax Station, VA

for auction - 8309 Crestridge Road, Fairfax Station, VA


Click Here FLV MPlayer - Free Download

Video Clips. Duration : 2.97 Mins.


for auction - 8309 Crestridge Road, Fairfax Station, VA


http://www.myallegiancehome.com/FX8033972 A Distinctive Difference! You\'ll find southern living at its best in this outstanding 5 bedroom, 5-1/2 bath, 3-car...

for auction - 8309 Crestridge Road, Fairfax Station, VA

for auction - 8309 Crestridge Road, Fairfax Station, VA


for auction - 8309 Crestridge Road, Fairfax Station, VA

for auction - 8309 Crestridge Road, Fairfax Station, VA

No URL for auction - 8309 Crestridge Road, Fairfax Station, VA

Grilling Ham on the Grill


ItemTitle

Pork has been celebrated as a special occasion food for centuries. Coined "the other white meat" pork is as versatile as chicken, and some may say even tastier. A method of cooking pork which is becoming more popular is on the grill. Grilled pork is more convenient than using the frying pans of ovens, and grilled food has an unmistakable smoky flavor that people seem to love. Contrary to popular belief, you don't have to be a grilling pro to pull off great tasting pork recipes. All you need is a little patience to make your next meal spectacular.

Grilling Ham on the Grill

Outdoor Grill

Grilled Peppers with Lemon & Salt - Basque Region


Click Here FLV MPlayer - Free Download

Tube. Duration : 7.15 Mins.


Grilled Peppers with Lemon & Salt - Basque Region


My version of a recipe from the Basque region.

Grilled Peppers with Lemon & Salt - Basque Region

Grilled Peppers with Lemon & Salt - Basque Region


Grilled Peppers with Lemon & Salt - Basque Region

Grilled Peppers with Lemon & Salt - Basque Region

No URL Grilled Peppers with Lemon & Salt - Basque Region

The DIY Patio Grill and Fireplace Double


ItemTitle

When you walk onto your patio, is there anything missing? Do you wish something was there but you just don't know what? All you need are some good ideas and you can have a late Spring project that will make your summer hopping this year.

The DIY Patio Grill and Fireplace Double

Outdoor Grill

Mini Propane/Butane Backpacking stove review


Click Here FLV MPlayer - Free Download

Video Clips. Duration : 2.27 Mins.


Mini Propane/Butane Backpacking stove review


I bought this stove from ebay. I paid a whole .98 with delivery included! This stove is directly comparable to the MSR Pocket Rocket, but at a fraction of ...

Mini Propane/Butane Backpacking stove review

Mini Propane/Butane Backpacking stove review


Mini Propane/Butane Backpacking stove review

Mini Propane/Butane Backpacking stove review

No URL Mini Propane/Butane Backpacking stove review

Sunbeam Grills Are No Longer Being Made - Find Out How to Keep Your Favorite GrillMaster Running Hot


ItemTitle

GrillMaster Grills were a series of excellent outdoor gas grills that were made by the Sunbeam company and sold throughout the United States.

Sunbeam Grills Are No Longer Being Made - Find Out How to Keep Your Favorite GrillMaster Running Hot

Outdoor Grill

Bull Brahma 5 Burner Gas Grill Inspection - BBQGuys.com


Click Here FLV MPlayer - Free Download

Tube. Duration : 1.77 Mins.


Bull Brahma 5 Burner Gas Grill Inspection - BBQGuys.com


Watch as Chef Tony lays out the features of the Bull Brahma 5 Burner Gas Grill. Also Check out the great line of Bull outdoor kitchen accessories and product...

Bull Brahma 5 Burner Gas Grill Inspection - BBQGuys.com

Bull Brahma 5 Burner Gas Grill Inspection - BBQGuys.com


Bull Brahma 5 Burner Gas Grill Inspection - BBQGuys.com

Bull Brahma 5 Burner Gas Grill Inspection - BBQGuys.com

No URL Bull Brahma 5 Burner Gas Grill Inspection - BBQGuys.com

Grilling Ham on the Grill


ItemTitle

Pork has been celebrated as a special occasion food for centuries. Coined "the other white meat" pork is as versatile as chicken, and some may say even tastier. A method of cooking pork which is becoming more popular is on the grill. Grilled pork is more convenient than using the frying pans of ovens, and grilled food has an unmistakable smoky flavor that people seem to love. Contrary to popular belief, you don't have to be a grilling pro to pull off great tasting pork recipes. All you need is a little patience to make your next meal spectacular.

Grilling Ham on the Grill

Outdoor Grill

Combo BBQ barbecue at Academy Sports


Click Here FLV MPlayer - Free Download

Tube. Duration : 5.50 Mins.


Combo BBQ barbecue at Academy Sports


A close up look at a couple of BBQ grills at Academy Sports.

Combo BBQ barbecue at Academy Sports

Combo BBQ barbecue at Academy Sports


Combo BBQ barbecue at Academy Sports

Combo BBQ barbecue at Academy Sports

No URL Combo BBQ barbecue at Academy Sports


A close up look at a couple of BBQ grills at Academy Sports.


Tags:


I love smoked hams. They come pre-cooked and are already packed full of flavor. I've experimented around with different flavor combinations until I found one that I really loved. Then I decided to move it to the grill. I was astonished by the results. I fire up my gas grill every Christmas Eve and Easter and make this recipe. Pineapple and brown sugar glazed ham with orange Dijon-honey sauce.


Outdoor Grill

Grilling Ham on the Grill


Grilled and Glazed Ham:


Grilling Ham on the Grill

You may want to make this recipe when hams go on sale. They can be rather expensive. While we're at the store, we'll want to grab a few items for this. First, get a nice smoked ham; I like the butt portion as opposed to the shank. It's meatier with less fat. Next, grab some pineapple juice, orange juice, Dijon mustard and some honey.

We're going to make the glaze for the ham first. In a medium sauce pan, pour in 2 cups of pineapple juice with ½ cup of brown sugar. Bring these ingredients to a boil and cut the heat back to medium and let it cook down until it's reduced by half. It will start to look thick, almost like syrup. In another pan, we want to make the sauce for the ham to pour over once it's cooked and sliced. Add 2 cups of orange juice and reduce that down just like the pineapple juice. When it's reduced down to ¾ to 1 cup, add 2 tablespoons of Dijon and 2 tablespoons of honey and combine well. Kill the heat and set aside.

There's not much preparation for the ham, just cut one burner of your grill on to medium low heat. We want to place the ham on the opposite side of the grill to cook with an indirect method. Place the ham, flat side down, on the opposite side of the grill, cover very loosely with foil and close the lid. Don't stray too far away from the grill, but you don't have to babysit either. This ham will cook for 2 hours before we begin to glaze.

After the 2 hours, we want to turn the heat up to medium and glaze the ham thoroughly. Using a clean, preferably new and unused paintbrush does a great job. After you glaze the ham, close the lid and return every 15 minutes to glaze again. In another 2 hours of glazing, we will have developed an awesome crust on the ham. Almost like a glossy candy-coat.

Be careful taking the ham off. Make sure to let it rest at least 20 minutes before cutting into it. Leave it sitting flat as it cooked and slicing will be that much easier. Drizzle a bit of the orange Dijon-honey sauce over and enjoy all the wonderful flavors. It's smoky, sweet and savory. It's a huge hit at my place. We have it twice every year, at least.


Grilling Ham on the Grill


Watch as Chef Tony lays out the features of the Bull Brahma 5 Burner Gas Grill. Also Check out the great line of Bull outdoor kitchen accessories and product...


Tags:


They are a beloved patio accessory for many families and have ably handled the outdoor cooking and grilling for many years.


Outdoor Grill

Sunbeam Grills Are No Longer Being Made - Find Out How to Keep Your Favorite GrillMaster Running Hot


But lately you may have noticed that they are becoming rarer and rarer.


Sunbeam Grills Are No Longer Being Made - Find Out How to Keep Your Favorite GrillMaster Running Hot

You are not imagining things.

Sunbeam stopped producing Grillmaster Grills in March of 2003.

But if you have a GrillMaster that you still use and want to keep on using - you are in luck. There are replacement parts for Sunbeam grills available through many online retailers. Thousands of parts are available for almost every models, so chances are good that you can find the one you need.

Gas Grill Wear Out

Even if you take excellent care of your gas barbecue grill, clean it every time and store it indoors, parts are still going to wear out from use and require replacement parts. And unlike a cheap charcoal grill, it is frequently far less expensive to repair or replace a part in a gas grill than it is to buy a whole new grill.

Gas grill burners will always rust with age due to there design and materials. Even stainless steel gas grill burners will wear out and even rust in time.

Your Sunbeam grilling accessories can also wear out and need replacing. These include the grates, heat shield, heat tent, flame tamer, and I-tent.

Rust, grease and drippings can also stick to the surfaces and cause flare-ups.


Sunbeam Grills Are No Longer Being Made - Find Out How to Keep Your Favorite GrillMaster Running Hot


I bought this stove from ebay. I paid a whole .98 with delivery included! This stove is directly comparable to the MSR Pocket Rocket, but at a fraction of ...


Tags:


I think that an outside fireplace is the perfect idea and it doesn't take much to put together. But before you get started and run out to buy all the materials you need, I think you should strongly consider creating a fireplace that doubles as a grill. Now, that's an idea that can really add some class to your backyard or patio.


Outdoor Grill

The DIY Patio Grill and Fireplace Double


Over the summer, you'll have twice as many barbecues because every weekend will be the perfect time for you to throw some steaks on the grill and invite some friends over to your house. You'll never get tired of it. But then when fall rolls around, you'll be able to enjoy some warm evenings in your backyard because you'll have a fireplace that will light up any evening when you want to relax outside with a cup of coffee and some friends.


The DIY Patio Grill and Fireplace Double

So, let's get started.

The materials you will need vary in your style and budget. But, what I suggest will be easy on both. You can learn how to build a brick structure if you want. It's not hard to stack bricks and make sure you cement them correctly. Then, wipe away excess cement so that it's not a sloppy build.

But, I think that you can build your structure with 2X4s and plywood. Of course, most people will shy from this solution because of the fire risk. But if you do it right, you can bring the risk to a minimum like they did in the old days when they built wood structured fireplaces in the home. 

The base will be a 4 foot wide by 4 foot long structure that rises about 2 feet from the ground. It should be made completely with brick. Then, you can build upon that the rest of the Fireplace / Grill structure. After the2X4 and plywood structure has been built, we protect it with rock or brick veneer. This is a small layer of the brick or rock that makes up your design. But, you don't have to learn how to master the art of creating brick and rock structures.

To address the safety issue, the fire should never be left unattended. This wouldn't happen if you are cooking steaks on the grill anyway. But if you are enjoying the fireplace and you want another drink from inside your home, there should be company outside to keep an eye on the fire. Furthermore if you are enjoying your fireplace alone, check the fireplace before going inside to make sure you don't see anything unsafe. Then, make your visit inside as short as possible. If you are going in for the evening, make sure your fire is out completely and you should never encounter any problems. Fires in traditional fireplaces are risky and yet, we live with the risk every day. So, just be safe and you should be able to enjoy your fireplace for a long time to come.

Make your overall height of the project about 6 feet and the width about 4 feet. The back part of the structure should be about 1 foot in depth. Then, you will build 2 foot high walls on both sides of the fireplace so that your structure has a place to hold the grill and surround the fire that you will build inside the structure. The face will be open for easy access so that you can effortlessly change your grill into a fireplace and vice versa.

You'll want to build a shelving solution for a griddle. This will hold your charcoal about 6 inches to 1 foot below the grill. You'll also need to get the grill accessory that holds your steaks or hamburgers above the charcoal flame. These can be found, sometimes somewhat remotely. But, I have a friend who tore about an old grill and simply used those accessories. It seems everywhere I look I find old grills that can serve this purpose for your project.

To keep the project completely safe, you should use a fireplace insert and gel fuel from Ventless Gel Fireplace. This is an environmentally friendly gel fuel that burns into water vapor and can be put out by simply placing the lid on the can. Granny Gel Fuel will produce a very large flame and will burn for hours while you enjoy your evening. You won't have to find firewood and you won't have an unpredictable flame that can possibly pose a fire risk.

You can get plenty of other unique fireplace ideas by visiting Ventless Gel Fireplace and downloading our reports. You can take these reports and use your own imagination to create just about anything you want. It's up to you how far you can go.


The DIY Patio Grill and Fireplace Double


My version of a recipe from the Basque region.


Tags:


I love smoked hams. They come pre-cooked and are already packed full of flavor. I've experimented around with different flavor combinations until I found one that I really loved. Then I decided to move it to the grill. I was astonished by the results. I fire up my gas grill every Christmas Eve and Easter and make this recipe. Pineapple and brown sugar glazed ham with orange Dijon-honey sauce.


Outdoor Grill

Grilling Ham on the Grill


Grilled and Glazed Ham:


Grilling Ham on the Grill

You may want to make this recipe when hams go on sale. They can be rather expensive. While we're at the store, we'll want to grab a few items for this. First, get a nice smoked ham; I like the butt portion as opposed to the shank. It's meatier with less fat. Next, grab some pineapple juice, orange juice, Dijon mustard and some honey.

We're going to make the glaze for the ham first. In a medium sauce pan, pour in 2 cups of pineapple juice with ½ cup of brown sugar. Bring these ingredients to a boil and cut the heat back to medium and let it cook down until it's reduced by half. It will start to look thick, almost like syrup. In another pan, we want to make the sauce for the ham to pour over once it's cooked and sliced. Add 2 cups of orange juice and reduce that down just like the pineapple juice. When it's reduced down to ¾ to 1 cup, add 2 tablespoons of Dijon and 2 tablespoons of honey and combine well. Kill the heat and set aside.

There's not much preparation for the ham, just cut one burner of your grill on to medium low heat. We want to place the ham on the opposite side of the grill to cook with an indirect method. Place the ham, flat side down, on the opposite side of the grill, cover very loosely with foil and close the lid. Don't stray too far away from the grill, but you don't have to babysit either. This ham will cook for 2 hours before we begin to glaze.

After the 2 hours, we want to turn the heat up to medium and glaze the ham thoroughly. Using a clean, preferably new and unused paintbrush does a great job. After you glaze the ham, close the lid and return every 15 minutes to glaze again. In another 2 hours of glazing, we will have developed an awesome crust on the ham. Almost like a glossy candy-coat.

Be careful taking the ham off. Make sure to let it rest at least 20 minutes before cutting into it. Leave it sitting flat as it cooked and slicing will be that much easier. Drizzle a bit of the orange Dijon-honey sauce over and enjoy all the wonderful flavors. It's smoky, sweet and savory. It's a huge hit at my place. We have it twice every year, at least.


Grilling Ham on the Grill


http://www.myallegiancehome.com/FX8033972 A Distinctive Difference! You\'ll find southern living at its best in this outstanding 5 bedroom, 5-1/2 bath, 3-car...


Tags: